 how-to
7 Reverse Osmosis Maintenance Steps for Longer System Life
Last Updated: November 2, 2026
Quick Summary
Reverse osmosis maintenance means shutting off the water supply and depressurizing the system, then replacing filters on a schedule set by your manual and water quality. Sanitize once a year, watch for membrane replacement signs, and get a water test to confirm membrane performance.
- Always shut off the supply valve and drain the system before opening any housing.
- Treat the manufacturer's interval as a ceiling and shorten it if filters discolour quickly.
- Sanitize the downstream side once a year, but never with the membrane installed unless the manufacturer allows it.
- Flush the lines until water runs clear and discard the first few tanks of product water.
- Slow output, changed taste, and rising TDS readings can signal the membrane needs replacement.
Table of Contents
- Why Reverse Osmosis Maintenance Matters for Your Drinking Water
- Step 1: Turn Off the Water Supply and Depressurize the System
- Step 2: Follow a Reverse Osmosis Filter Replacement Schedule
- Step 3: Sanitize the System Once a Year
- Step 4: Recognize the Reverse Osmosis Membrane Replacement Signs
- Troubleshooting Low Water Flow in Your Reverse Osmosis System
- Book a Water Test and Maintenance Check With Pure Life H2O
- Frequently Asked Questions
Keeping a reverse osmosis system in good shape is one of the simplest ways to protect your drinking water. Water treatment systems are most likely to run into trouble when they are installed but never maintained. Routine care keeps filters working, protects the membrane, and helps your water taste the way it should. Below, we walk through the steps that matter most.
Why Reverse Osmosis Maintenance Matters for Your Drinking Water
Reverse osmosis maintenance means keeping every part of the system clean, replaced on time, and working as designed. Without it, filters clog, flow slows, and the membrane can lose performance. Water quality can also suffer if a worn filter stops doing its job.
Maintenance schedules differ by system, so always check the manufacturer's instructions first. Published guidance varies widely, and there is no single interval that suits every unit. A reliable routine starts with the manual and a simple calendar reminder.
- Protects the membrane from early clogging
- Keeps water flow at a steady rate
- Helps your drinking water taste fresh
- Makes repairs less likely
Step 1: Turn Off the Water Supply and Depressurize the System
Before you touch any part of the system, shut off the cold water supply valve that feeds the unit. Then open the RO faucet and let the water drain until the flow stops. This releases the pressure stored in the storage tank and lowers the risk of leaks or spray when you open the housings.
Once the system is depressurized, you are ready to work safely. Keep a towel and small bucket nearby, since a few drops of water are normal when housings come off.
Watch out: Skipping this step can send water spraying when a filter housing loosens, so never twist a housing while the line is still pressurized.
Step 2: Follow a Reverse Osmosis Filter Replacement Schedule
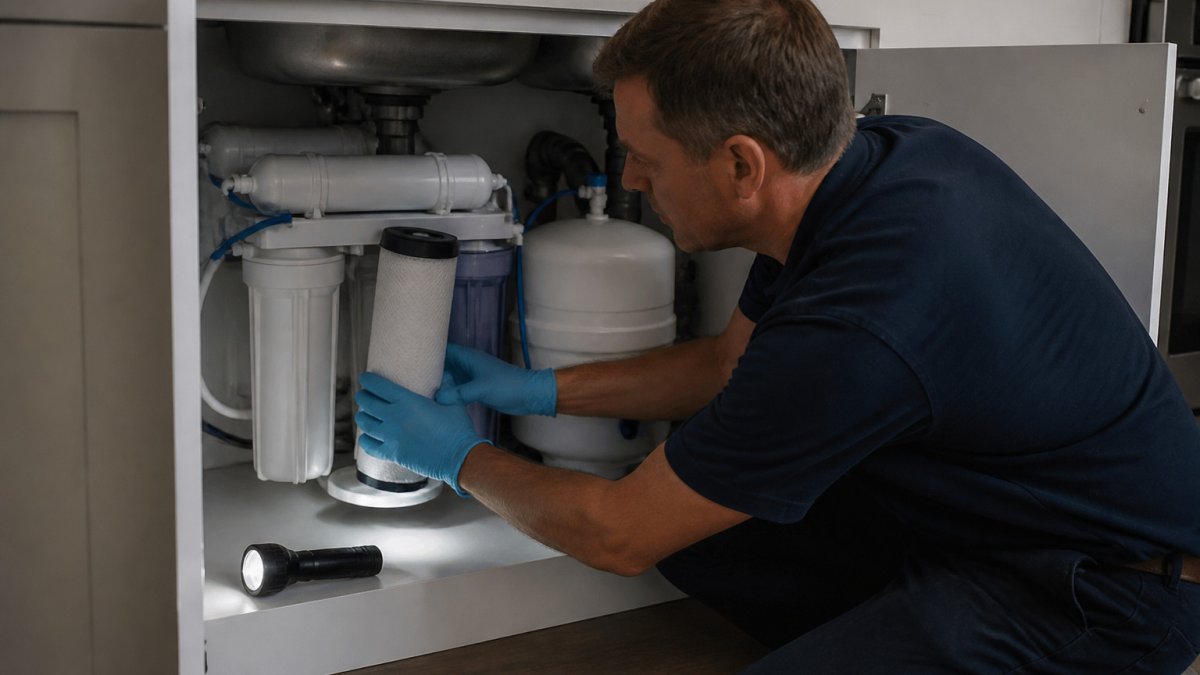
Most RO systems use several filters, and each one wears out at a different rate. Replacing them on schedule protects the membrane and keeps your water clean. To see which components your unit includes, review the reverse osmosis system overview. There is no universal calendar, though, the right interval depends on your system design, your feed water, and how much drinking water your household draws each day. That is why the manual is the starting point, not a generic chart.
Why Schedules Vary by System and Water Quality
A four-stage under-sink unit and a larger system with a booster pump and permeate pump do not wear filters at the same rate. Systems with a permeate pump can recover more product water and send less to drain, which changes how hard the membrane and pre-filters work.
A practical pattern many homeowners follow is to treat the manufacturer's interval as a ceiling and adjust downward based on what they see. If your sediment filter turns brown within weeks, your water is telling you the schedule needs to be tighter. If it still looks clean at the recommended change point, you can stay on the manual's timing rather than guessing.
Sediment and Carbon Pre-Filters
The sediment and carbon pre-filters come first in the system. They catch sand, rust, and chlorine before water reaches the membrane. When these filters clog, the membrane has to work harder and may wear out sooner. Carbon also protects the membrane from chlorine damage, which is a common cause of premature membrane failure in municipal supplies.
Replace pre-filters based on the manufacturer's guidance, which varies by model. Heavy sediment or a strong chlorine taste can mean you need to change them sooner. A simple habit: write the install date on each cartridge with a marker so the next change is obvious.
The Post-Filter and Storage Tank
The post-filter polishes water before it leaves the faucet. Replace it as the manual directs, typically on a longer cycle than the pre-filters. Keep an eye on the storage tank too. If water tastes stale, drain the tank, check the tank valve, and clean it when you service the system. A tank that will not hold pressure, you get a weak stream right after the system has been idle, is a sign the bladder or charge needs attention, not just a filter change.
Build a Maintenance Log That Fits Your Home
A log turns a vague schedule into something you can actually follow. Record the date, the cartridge or membrane changed, and a quick note on feed-water appearance or taste.
Pair the log with a TDS meter check at each service. Compare feed-water and product-water readings and note them alongside the date. Rising product-water TDS across several checks, with fresh filters in place, is a stronger signal of membrane decline than any single reading.
When in doubt, a water test before you buy a year's worth of filters tells you whether sediment, hardness, or chlorine is driving your replacement pace.
The right replacement interval depends on your system and water quality, so this table summarises the key factors and checks to build your own schedule.
| Factor | Effect on schedule | What to check |
|---|---|---|
| Manufacturer's interval | Sets the ceiling for changes | Check the manual first |
| Heavy sediment or chlorine | Shortens pre-filter life | Change sooner if filters discolour |
| Soft, low-sediment water | Can stretch pre-filter life | Stay on manual timing |
| Permeate pump systems | Change membrane and pre-filter wear | Follow model-specific guidance |
| Storage tank | Can taste stale if neglected | Drain, check valve, clean at service |
| Rising product TDS | Signals membrane decline | Compare readings over several checks |
Step 3: Sanitize the System Once a Year
Sanitizing removes bacteria and residue that can build up inside tubing, fittings, and the storage tank over time. It is a hygiene step, not a repair: it does not restore a failing membrane or fix a clogged pre-filter, so service the filters first and sanitize as the final part of the job. Sanitizing is typically done periodically, but follow your model's instructions, since systems specify different intervals and procedures.
What Sanitizing Does and Does Not Do
Sanitizing reduces the chance of bacterial growth in the downstream side of the system, the storage tank, post-filter housing, tubing, and faucet. It does not make microbiologically unsafe water safe to drink. If your concern is bacteria in the source water, that is a treatment question, not a maintenance one, and it belongs with a water test and the right upstream solution. For private supplies, well water treatment can address source-water concerns that sanitizing alone cannot.
Safety and Sanitation Precautions
Work with the system depressurized and the filters removed as the manufacturer describes. Wear gloves, keep the sanitizer away from skin and eyes, and never mix it with other cleaning products. Use only a sanitizing product approved for drinking water systems, and measure it as directed, more is not better, and a strong solution is harder to flush out completely.
Keep the work area clean. Wash your hands before handling cartridges, avoid setting housings on the floor, and do not reuse a cloth that has touched the drain or cabinet base. Contamination introduced during service is one of the more avoidable causes of odd taste afterward.
Flush Before You Drink
After sanitizing, flush the lines until the water runs clear and has no sanitizer taste or odor. Run the faucet in short bursts, let the tank refill, and repeat. Discard the first few tanks of product water rather than drinking it. If any sanitizer taste lingers after several flushes, stop and recheck the procedure against the manual rather than drinking through it.
A Simple Annual Service Order
A repeatable order keeps the job safe and thorough: shut off and depressurize, remove and replace filters, sanitize the downstream side, flush thoroughly, reinstall the membrane and cartridges, then restore pressure and check every fitting for leaks. Log the date and note anything unusual, a slow drip, a cloudy tank, or a change in taste, so the next service starts with context. If the system has not been serviced in a long time, a professional check is worth it before you rely on a DIY sanitizing cycle.
Step 4: Recognize the Reverse Osmosis Membrane Replacement Signs
The RO membrane is the heart of the system, and it does not last forever. Watch for these warning signs:
- Output slows down noticeably
- Your water tastes or smells different
- A TDS meter shows rising readings compared with earlier tests
- Water waste increases while output drops
Some of these symptoms can have simpler causes, such as a clogged filter. A water test will confirm whether the membrane is the real issue before you decide on replacement.
Troubleshooting Low Water Flow in Your Reverse Osmosis System
Low flow is the most common complaint. Start with the easy checks. Confirm the feed valve is fully open, look for kinks in the tubing, and check the storage tank pressure. Then inspect each filter for clogs, since a blocked pre-filter often causes the slowdown.
If flow stays low after filter changes and a sanitizing cycle, the membrane may be failing. A professional check can help identify the cause, and Reverse Osmosis vs Whole Home Filtration explains how the two options differ.
Book a Water Test and Maintenance Check With Pure Life H2O
Regular maintenance keeps your system working, but a water test shows whether it is doing its job. At Pure Life H2O, we recommend starting with water testing so recommendations fit your home. If you use a private supply, our well water system services cover treatment for iron, sulphur, and other concerns.
Ready to get started? Get your free water test and let our team check your system's performance and plan your next maintenance steps.
Frequently Asked Questions
How often should reverse osmosis filters be changed?
Most residential reverse osmosis systems use sediment and carbon pre-filters that need replacing every 6 to 12 months, and the post-filter is usually changed on a similar schedule. Published guidance varies, and some systems list intervals of up to two or three years, so the manufacturer's instructions for your specific model should be your first reference. Filters should also be changed sooner if water flow drops noticeably or the taste changes. Keeping a dated log of each change makes it easier to plan the next one.
How do you clean and sanitize a reverse osmosis system?
Sanitizing involves shutting off the water supply, depressurizing the system, and removing the pre-filters and post-filter for cleaning. Use a food-safe sanitizing solution as the manufacturer directs, circulate it through the housings and storage tank, then flush the system thoroughly with clean water before reconnecting the filters. Many manufacturers recommend doing this about once a year. If you are unsure of the correct solution or concentration, a professional service visit is a safe option.
How can you tell when a reverse osmosis membrane needs replacing?
Common signs include a sustained drop in water production, a noticeable change in taste or odour that filters do not resolve, and a membrane that is past the lifespan given in the manufacturer's documentation. A water quality test before and after the membrane can confirm whether it is still performing. Because membrane condition is hard to judge by eye, testing is more reliable than guessing from water volume alone.
Why is my reverse osmosis system producing water slowly?
The most common causes are clogged pre-filters, a low storage tank pressure, a membrane that is fouled or near the end of its life, or a restricted drain line. Start by checking and replacing the pre-filters, then confirm tank pressure is in the range the manufacturer specifies. If slow production continues after these steps, a professional inspection can identify the cause and whether the membrane needs replacing.